 AudioMap
Mini is a sample browser that functions as an instrument. Capture your performances, play in key, play your gestures and more.
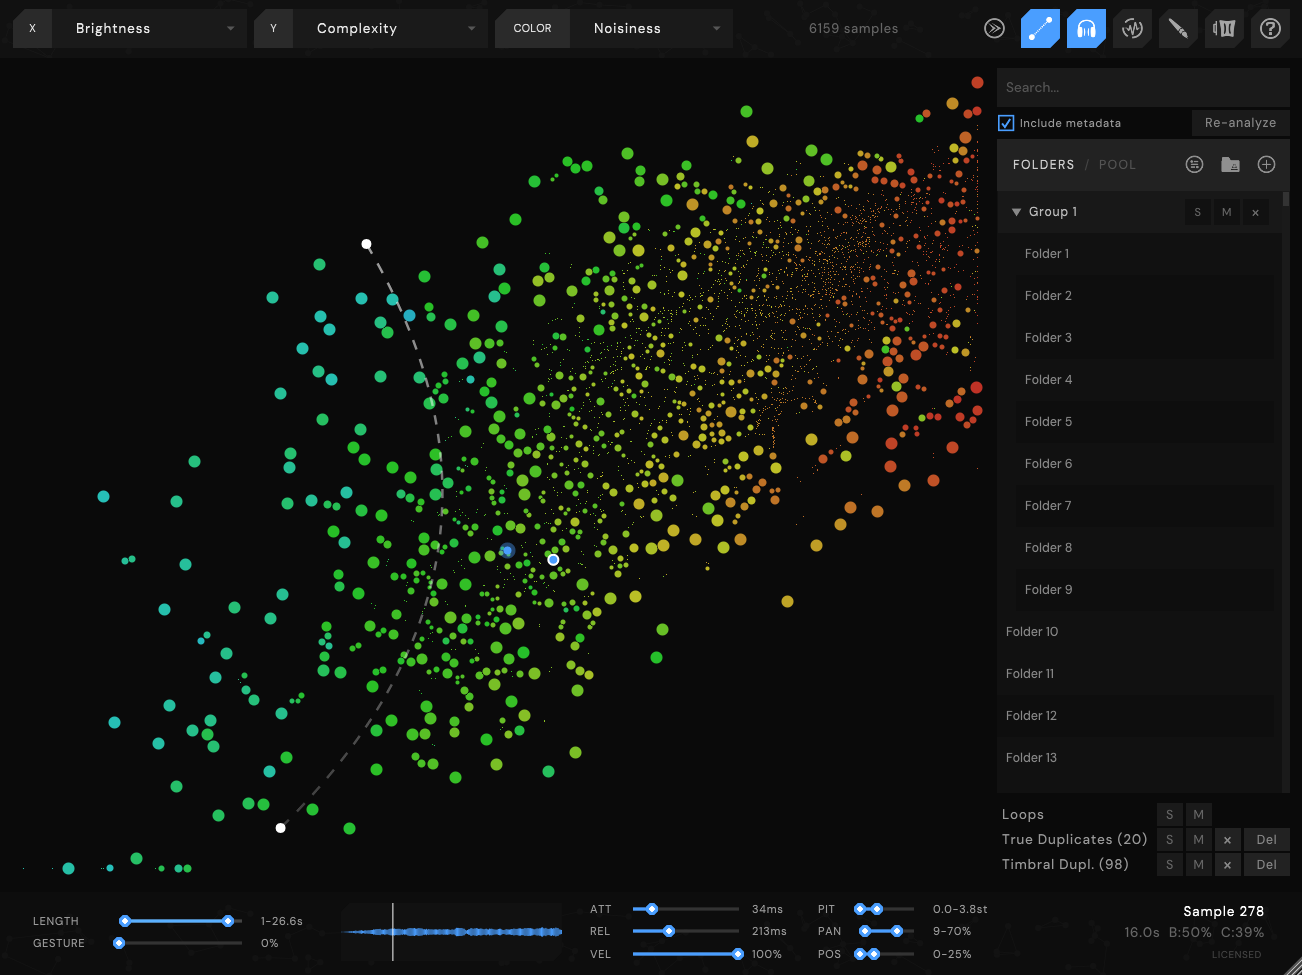
Mini displays loaded samples as colorful dots in a X / Y scatter plot, the position of which is determined by analyzing the samples' sound qualities and distributing them accordingly. The parameters are: brightness, noisiness, complexity, attack, percussiveness, length, loudness, harmonicity, chroma, pitch and pitch focus.
These can also be customized by directly choosing a specific parameter and binding it to the X and Y axes at will.
Hovering over the samples will allow you to play them back instantly.
Turn your sample library into an instrument. Gesture recording lets you draw a path across your sample library and play it via automation.
MIDI line maps your samples onto MIDI keys for real-time performance.
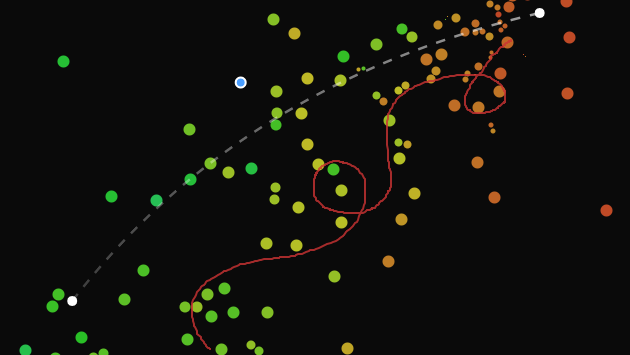
Once you find a desired sample, drag it to your DAW. Shift+Drag lets you select multiple samples at once.
Adjust attack and release envelopes to activate polyphonic playback and create textures. Randomize pitch/pan/start position per trigger to turn Mini into a sound design tool.
Mini analyzes the pitch and harmonicity of your samples, so you can play the whole library in a key three ways: Filter shows only the samples that fit the key, Harmonize retunes each triggered sample onto the key as you play, and Shift transposes the entire map by the note you hold.
Alt+Drag any sample up or down to retune it, hold Ctrl to snap to semitones. Shift+Alt+Drag trims its level. Tunings and trims are saved with the project.
Record Mini's output straight to disk from the footer, no DAW routing needed. Each take is saved as a WAV clip you can audition and drag back into your DAW.
Mini is constantly optimized for scale. Currently stress-tested to 500k samples loaded at once. Analysis results are cached per-folder, so subsequent loads are quick.
Organize your samples into folders and switchable groups that can be triggered via CC and key commands, allowing them to perform in real time.
Solo / Mute loops, find True duplicates (exact file copies), Timbral duplicates (similar sounds) and delete if needed.
The central 2D space that maps all visible samples based on X/Y properties. Scroll to zoom, right-click drag to pan, double-click to reset.
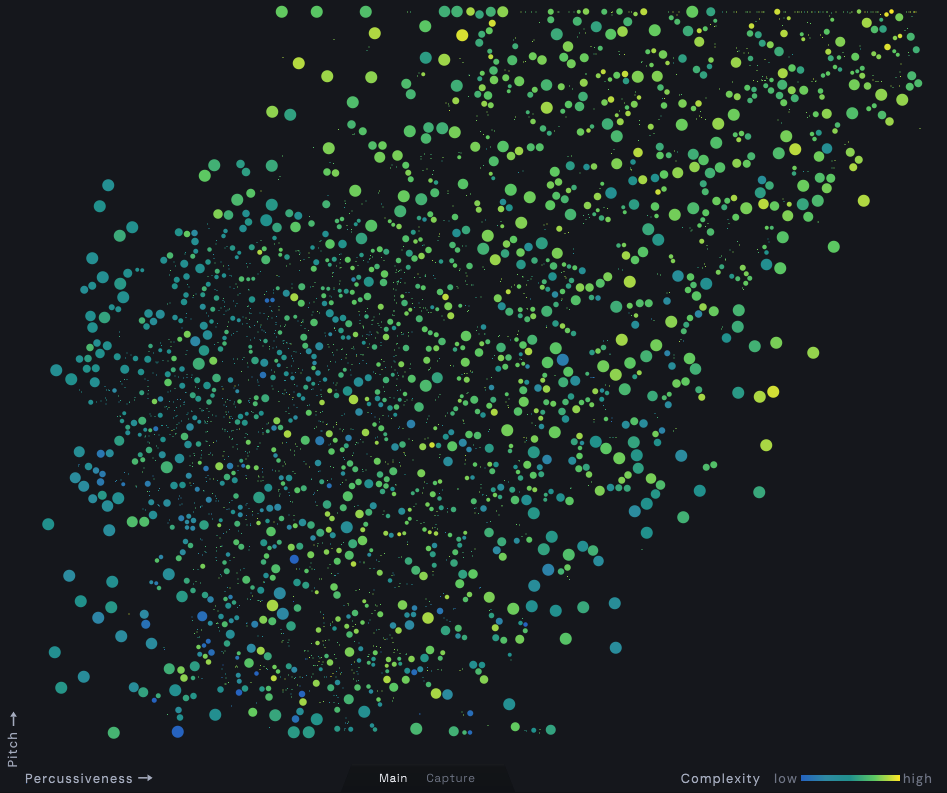
Eleven parameters are available for the X, Y, and color axes:
| Parameter | What it measures |
|---|---|
| Brightness | How bright or dark the sound is |
| Noisiness | Noise-like vs tonal |
| Complexity | Bandwidth and spectral variation of the sound |
| Attack | Onset sharpness - how quickly the sound starts |
| Percussiveness | Transient energy relative to sustain |
| Length | Duration of the sample |
| Loudness | RMS level |
| Harmonicity | How tonal vs noisy the sample is (detects one or several pitches) |
| Chroma | The most prominent pitch class (note), regardless of octave |
| Pitch | Register of the sample - low to high |
| Pitch Focus | How strongly a single pitch dominates the sample |
By default, hovering over the samples in the scatter plot automatically triggers its playback. By utilizing the attack / release parameters for playback and the pitch / pan / sample start randomization parameters, the user can turn mouse gestures into musical results.

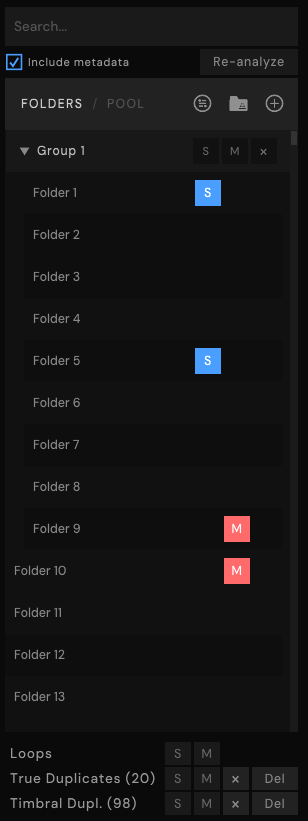
The right panel is reserved for sample library organization, search, presets and pool.
The footer contains playback controls and sample information.

Mini analyzes the pitch of each sample - its register, its most prominent note (chroma), and how tonal or noisy it is (harmonicity and pitch focus). These become axes and range filters like any other, and they drive Mini's key features.
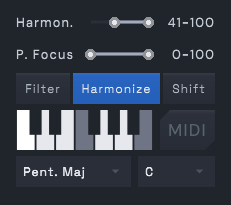
Harmonize and retuning work best when Mini can read a clear pitch. Filtering out low-harmonicity or low pitch-focus samples (via those range filters) keeps ambiguous, noisy sounds out of the way and makes the retuning noticeably more accurate.
Set a key from the scale and root dropdowns in the Filters panel, build a custom scale, or just play and let the incoming notes set it. Then choose how the library responds:
A MIDI toggle decides what sets the key: when on, the incoming MIDI drives the filtering / harmonization; when off, it follows the key you picked.
Retune any sample individually. Hover a sample and Alt+Drag up or down to change its pitch; hold Ctrl as well (Alt+Ctrl+Drag) to snap to semitones. A live readout shows the offset, and retuned samples are marked on the plot. Alt+double-click resets a sample to its original pitch. To retune several at once, Shift+Drag to select them first, then Alt+Drag. It works on pool samples too.
Trim a sample's level the same way: Shift+Alt+Drag sets a per-sample loudness offset in dB, and Shift+Alt+double-click resets it. Tunings and level trims are saved with the project and per device, and re-apply on load.
Press P to toggle hover preview on/off - samples play automatically as you move over them. Loops play continuously on hover. Mini supports 64-voice polyphony. When a MIDI line is drawn, MIDI notes trigger samples along the line based on note number.
Notes you play from a MIDI keyboard use the same attack and release envelopes as hover playback, so they can layer polyphonically. Mini also responds to the sustain pedal (CC64) and to pitch-bend, with a bend range you can set in the settings.
Ctrl+Drag on the scatter plot creates a MIDI line between two points, mapping samples to the keyboard. Toggle visibility with the MIDI Line button in the header.
Press R to start recording, then move your mouse across the scatter plot. Press R again to stop. Use the gesture slider or CC1 to scrub through the recorded path, triggering samples along it. Clear with the trash icon.
Press Q to toggle quantization. Gesture playback, the hover preview, and the cursor (automation / CC / scrubbing) each have their own grid, so you can snap them independently. Choose a subdivision (1/1 through 1/32, plus triplet variants) and triggers land on the DAW's tempo grid. Gesture Sync locks gesture playback to the host tempo - one pass spans 1, 2, 4, or 8 bars.
Record whatever Mini is playing straight to disk, without routing it through your DAW. The Main / Capture switch in the footer flips between the map and the capture console. Press C (or hit REC) to start and stop; each take is written to disk as a WAV. Takes show up as clips: click one to audition, or drag it straight into your DAW or file manager. Clear wipes them.

The power of Mini lies in polyphonic playback with randomization combined with automation, making it possible to carve out all kinds of sound textures.
Randomization - these apply only to playback, not to exported files:
Length filter - Drag the min/max handles to filter by sample duration (default range 0–30s, at 30s there is no upper cap). Enable "Remove 30s playback cap" in settings to load full audio for longer samples.
The Folders tab in the right panel visualizes folder structures and lets you reorder and make your own structures. Click + to add a folder (scanned recursively), or drag folders from your file manager directly into the plugin. An added folder appears as a collapsible tree — click a folder row to expand or collapse its subfolders. Multi-select with Shift+click or Ctrl+click, and drag rows to reorder or nest them (dragging a folder into its own subtree is refused to prevent cycles).
Each row has S (solo), M (mute) and X buttons. Hovering a folder highlights its samples on the scatter plot grid.
X deletes that folder (or group, or whole tree) and the samples it contains from the plugin — it never deletes the audio files on your disk. Deletions persist: a removed folder stays gone when you reopen the project or relaunch. Drag the folder back in to restore it.
You can also ungroup a group or a folder by right-clicking it and choosing Ungroup.
Select multiple folders and press Ctrl+G to group them. Groups can be collapsed, soloed/muted as a unit, as well as renamed, or deleted. Use Ctrl+0 to clear all group solos, or Ctrl+1 through 9 to solo a specific group. Folder/group solo & mute and the folder layout are saved per project instance.
Click the preset button to open the preset manager. Save, rename (R), or delete (X) presets. Presets store the folder layout: folder paths, groups, the tree structure (drop roots, collapse and reorder state), and per-folder and per-group solo/mute. Plot settings such as axes and filters are not part of a preset.
Use "Save as Default" to set the current configuration as the default for new instances.
Press F while hovering over or selecting a sample to put it in your favourites. Use Shift+Drag to select multiple, then F to batch-favourite. Favorites are saved per-device and persist across sessions. Use the filter section's solo/mute controls to quickly isolate your marked samples.
The pool is a temporary area for collecting samples before doing a batch Drag&Drop. Hover or select a sample and press A to add/remove it. Shift+Drag to select multiple samples, then A to batch add. You can also drag samples from the plot onto the right panel.
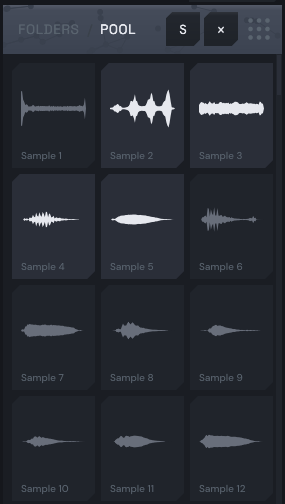
The Pool tab shows collected samples as a tile grid with waveform previews. Click to preview, X to remove, drag to reorder. Use the grip icon (9-dot icon) to drag all pool samples to your DAW at once.
When the Pool tab is active, pool samples are highlighted on the scatter plot with white ring indicators.
Exported files are always the original, unmodified audio - randomization settings are not exported.
By default, Mini exposes automation parameters that can be hooked to external controls:
Moreover, Mini provides additional control via these CC parameters:
| CC | Function |
|---|---|
| CC1 | Gesture position - scrubs through recorded gesture path |
| CC2 | Cursor X - moves the XY cursor horizontally |
| CC3 | Cursor Y - moves the XY cursor vertically |
| CC4 | Group solo - 0 clears all solos, 1-127 exclusive-solos that group |
| CC5 | Key scale - selects the scale used for Filter / Harmonize / Shift |
| CC6 | Key root - selects the root note |
| CC20-23 | The three quantize grids (Gesture, Hover, Cursor) and Gesture Sync |
The XY cursor (CC2/CC3) also works without the editor open, enabling headless sample triggering from a MIDI controller.
| Key | Action |
|---|---|
| P | Toggle hover preview |
| Q | Toggle quantization |
| R | Toggle gesture recording |
| F | Toggle favorite on hovered/selected sample |
| A | Add/remove hovered/selected sample to pool |
| C | Start / stop output capture |
| L | Reveal the hovered sample's folder |
| Ctrl+G | Group selected folders |
| Ctrl+C | Copy selected sample's file path |
| Ctrl+Drag | Draw MIDI line on scatter plot |
| Shift+Drag | Multi-select samples (rubber band) |
| Alt+Drag | Retune hovered / selected sample |
| Alt+Ctrl+Drag | Retune, snapped to semitones |
| Shift+Alt+Drag | Set per-sample level (dB) |
| Drag out | Export sample to DAW |
| Scroll | Zoom scatter plot |
| Right+Drag | Pan scatter plot |
| Double-click | Reset zoom |
| Escape | Dismiss active MIDI line |
| Home | Reset zoom to 1x |
| Ctrl+V | Paste folder/file paths from clipboard |
| Ctrl+0 | Clear all group solos |
| Ctrl+1-9 | Solo group 1-9 |
Open the help overlay (? button) to access the following settings:
Shared across all DAW projects:
Saved with your DAW project, independent per plugin instance: